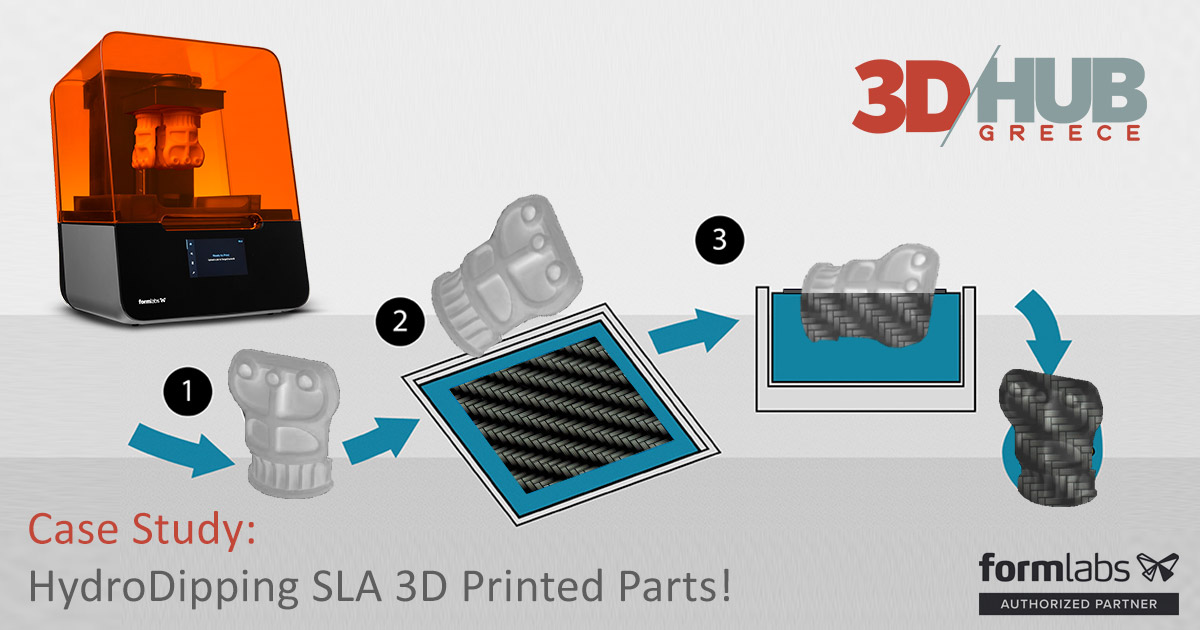
HydroGraphics or Hydro Dipping is a water transfer printing method of applying printed designs to three-dimensional surfaces. The hydrographics process can be used on metal, plastic, glass, hard woods, and various other materials and normally it is being done using special equipment by professionals, mostly for automotive parts but also for customizing any other object like helmets, gun grips, casings of electronic devices and many other parts that can withstand dipping into water to go through this process.
Given the fact that 3D Printing offers huge flexibility as far as creating custom parts is concerned and also knowing that SLA 3D printed models have greater surface quality than other technologies, we decided to give it a try and use our own 3D prints to hydro-dip them in our lab!
For this task we specifically selected our Formlabs Form 3, Form 3L and Form 2 3D printers because of the superior surface finishing they provide (due to the round laser spot their laser SLA technology uses to cure the liquid resin, compared to the square pixel of DLP and LCD variants) and also for their high quality and more long term lasting resin formulations, standard or engineering variants that can be used for end user functional parts and not just prototypes. Combining these advantages with the color infusing capabilities of this method, we ended up with perfect full color 3D printed parts that look like a final industrial product.

It uses the very simple principle of water tension allowing the ink of the printed pattern to curve around any shape that gets dipped inside. All is required for applying this process a big tank of water with temperature control and sheets of the printed designs. These patterns are printed on a special PVA (polyvinyl alcohol) clear film which gets laid on the surface of the water and then sprayed on with a special chemical activator which speeds up the process. The clear film is water-soluble, and dissolves after applying this activator solution so what you actually end up having is the ink of the pattern floating on the surface of the water! Dipping of the parts is being done slowly and this way the ink is transferred onto the dipped parts. Any remaining residue is then rinsed off thoroughly. The ink adheres to the desired surface and it cannot be washed off easily. It is then allowed to dry and finished of with some kind of varnish to seal the patterns and make the surface scratch proof and glossier.

OUR WORKFLOW
For this case study, we gathered a lot of different SLA prints, of various categories, artistic decorative parts, electronic casings, fashion items and other usable parts. Goal was to demonstrate that we can combine both processes and have perfect results for end user products or high end prototyping for expos or presentations.
The parts needed to be perfectly dry, without any resin residue or grease, so that the ink adhesion would be perfect.
Color of parts affects the end results as the printed films are transparent and there is an amount of the actual parts being left visible as background. So depending on design we also used either different resin color or went through spray painting the parts to get the desired effect.
Also depending on part geometry we could use some of them as they were if it was easy for us to hold them without covering any of the front surfaces, or else we had to temporarily glue a kind of handle so that dipping was done easier.
As tank we used a medium sized Sous Vide device, which is actually a wide water boiler with electronic thermostat to control the temperature at a desired level.
We acquired several HydroGraphics ready color film rolls, with a variety of designs, in order to experiment with various patters, cartoons, camouflage, carbon like patterns and other artistic templates.
Before dipping we matched the prints with the desired design and we pre-cut the films into appropriate sizes, taking into consideration to have enough material floating to cover all parts of the object. We covered the edges of the sheets with masking tape so that the film did not wrinkle or deform while floating.
After each dip, we left the parts into cold water for a few minutes to have any PVA residue washed away and then we left them to dry. We filtered the water using 3M 125 micron filters to have it ready for next dipping and then we repeated the cycle for all the items of our test. Procedure is very fast as the time needed for each film to be ready for item dipping was about 30-60 seconds after applying the activator spray, it is also something that comes with experience as you notice the surface of the color film to become shinier as the PVA substrate dissolves.
Last step after having the dipped parts completely dry, was to finish them with a clear varnish coating, glossy or matte depending on desired effect!
This experiment proved we have just scratched the surface regarding the capabilities of post processing of the 3D printed parts.


